HAR
HAR Transmitters are represented by the on the action panel. You can use the ATMS to:
- View the status and current playlist of transmitter
- Post a message to a transmitter
- Remove a message from a transmitter
- Schedule a message for inclusion in a transmitter playlist
- Manage a library of messages for the transmitters
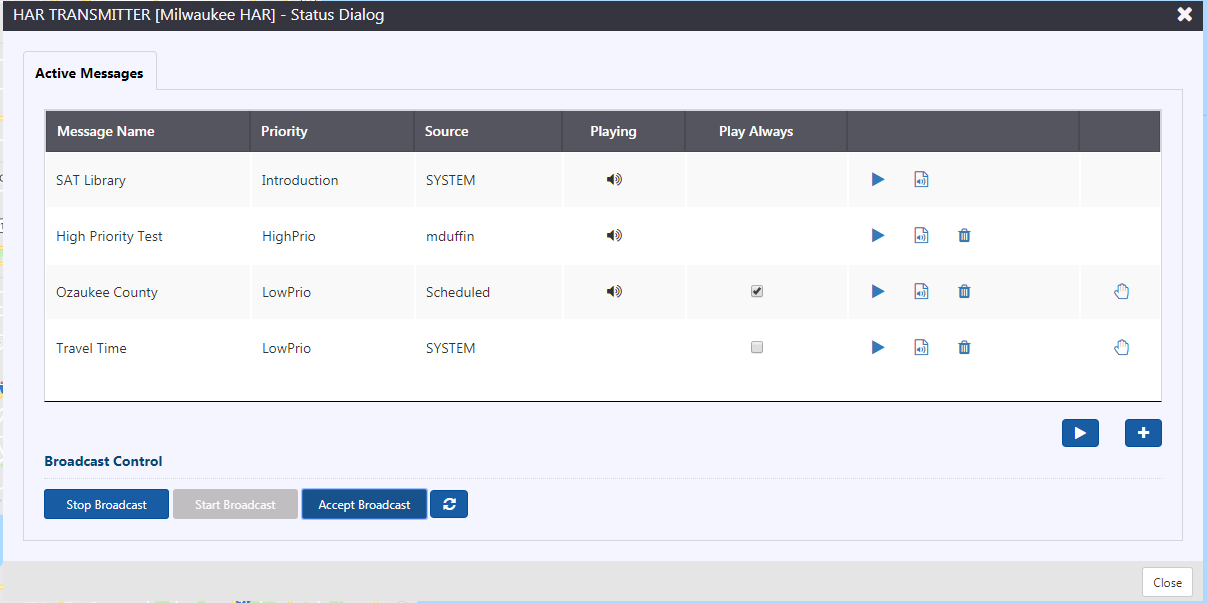
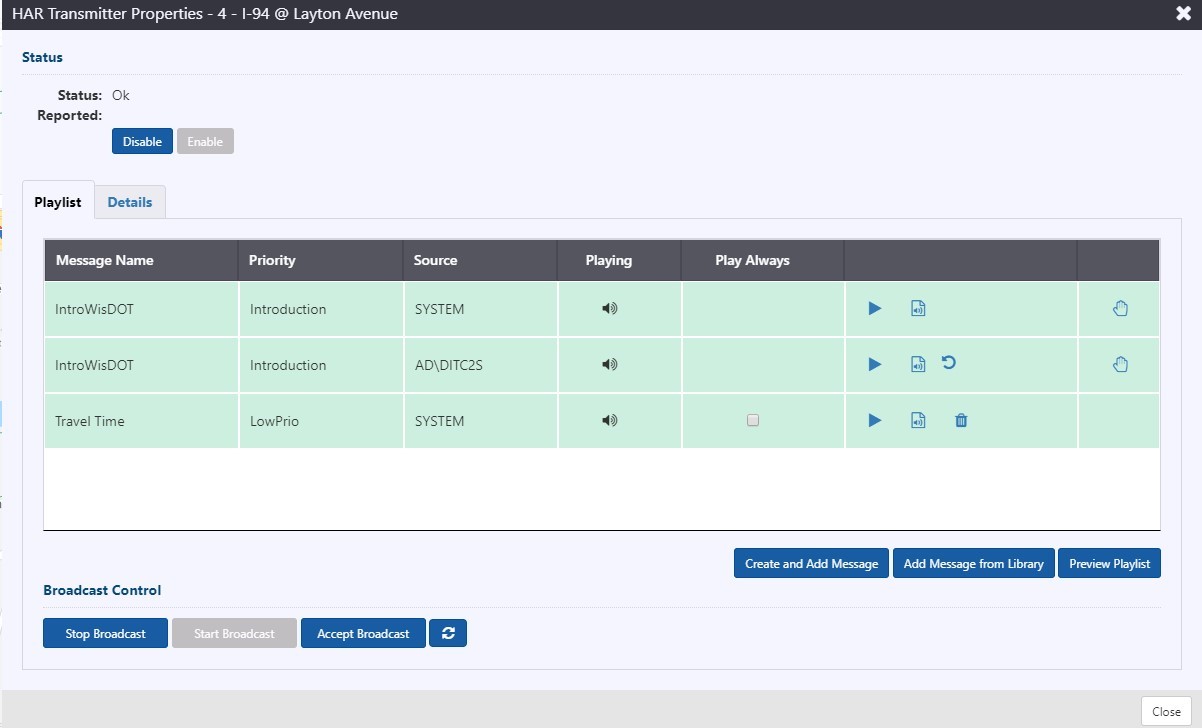
The ATMS manages a queue of messages for each transmitter. If there are no high priority messages in the queue for the transmitter, all queued messages are included in the playlist sent to the transmitter. If there are high priority messages in the queue, only the station identification and high priority messages are included in the playlist sent to the transmitter. If a low priority message should be included in the playlist along with the high priority message(s), users can select Play Always to force inclusion. The Transmitter view indicates which messages in the transmitter's queue are included in the current playlist by displaying an audio/sound icon in the Playing column.
| MESSAGE TYPE | DESCRIPTION |
|---|---|
| Introduction | Configured for each transmitter and always included at the beginning of the playlist. This includes station identification messages |
| High Priority | Always included in the playlist. Configured event response and library messages |
| Low Priority | Included in the playlist only if no high priority messages are in queue for the transmitter, or a user has selected the Play Always option. Configured event response, library, and travel time messages |
Turn the HAR Layer On or Off
To turn the HAR layer on or off, click the on the action panel. When the HAR layer is displayed, the icon is highlighted.
Transmitter Icons
The HAR Transmitter icons indicate the status of each transmitter, and the priority of the highest priority message in the current transmitter playlist. The transmitter icons you will see are as follows:
| ICON | DESCRIPTION |
|---|---|
| Low Priority: The radio icon indicates that only introductory or low priority messages are present in the playlist. | |
| High Priority: A transmitter with an exclamation mark indicates a high priority message is included in the playlist. | |
| Error: A transmitter with a red border indicates the transmitter is not communicating or has an error preventing the ATMS from controlling it. | |
| Disabled: A grey icon face indicates that the transmitter has been disabled by a user. The ATMS will not communicate with a transmitter while it is disabled, and will have no information about the current playlist or status of the transmitter. |
View a List of Transmitters
To open a list of all transmitters configured in the ATMS, right click on the HAR icon on the action panel and select the HAR Transmitter List option.

- The status of each transmitter and
- Highest message priority for each transmitter
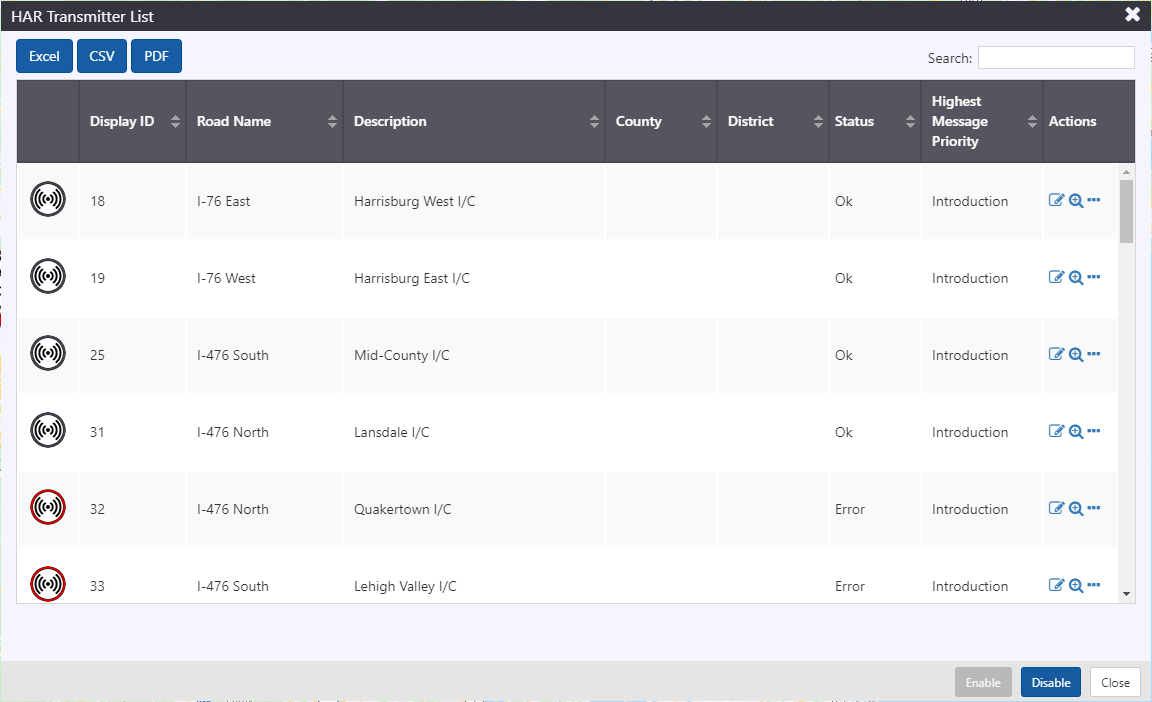
Each row contains a set of buttons that can be used to manage the transmitter.
| ICON | DESCRIPTION |
|---|---|
| Open transmitter properties screen | |
| Center the map on the transmitter | |
Open Menu with options to
|
Search for a Transmitter
You can search the Transmitter list using the Search box at the top right of the window. See section Search a List for more details.
Sort the Transmitter List
You can sort the list by the icons in its header. See section Sort a List for more details.
Manage a Transmitter
The Transmitter Properties view provides access to the current transmitter queue and playlist, and to its control features. To open the properties view for a transmitter you can either:
- Right click on the map icon of the desired transmitter and select Properties
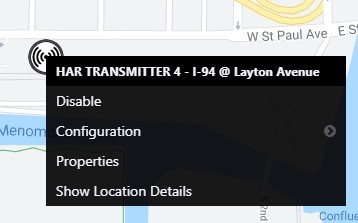
- Right click on the HAR icon on the Action Panel and select HAR Properties
The properties view shows all of the messages the ATMS is currently managing for the transmitter. The messages that are included in the playlist sent to the transmitter are indicated by the �sound� icon in the Playing column.
Add a Message to a Transmitter
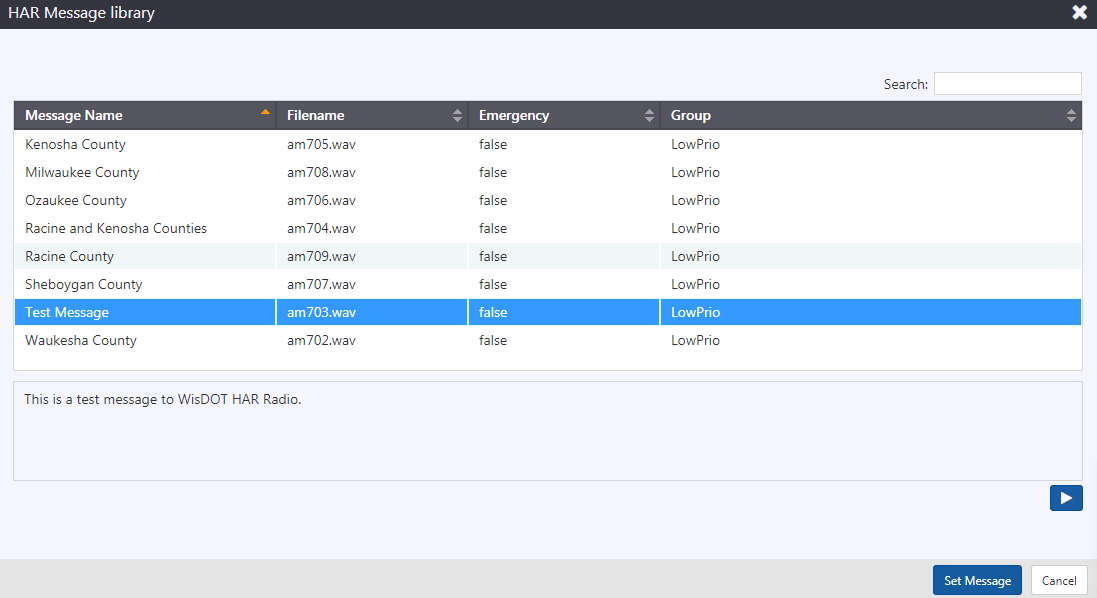
To add a message to the queue for a transmitter, click the button below the list of messages on the HAR Properties view. You will be presented with a view of the HAR message library. Optionally use the Search box to find the desired message.
When you select a row in the table, the bottom portion of the view updates with the text of the message. You can preview the audio of the message by clicking on the button. Click Set Message to add the message to the transmitter queue.
The properties view is updated with the new message, and all messages that will be included in the new broadcast are highlighted in green. If the new message will be included in the playlist, click Accept Broadcast to publish it to the transmitter.
Remove a Message
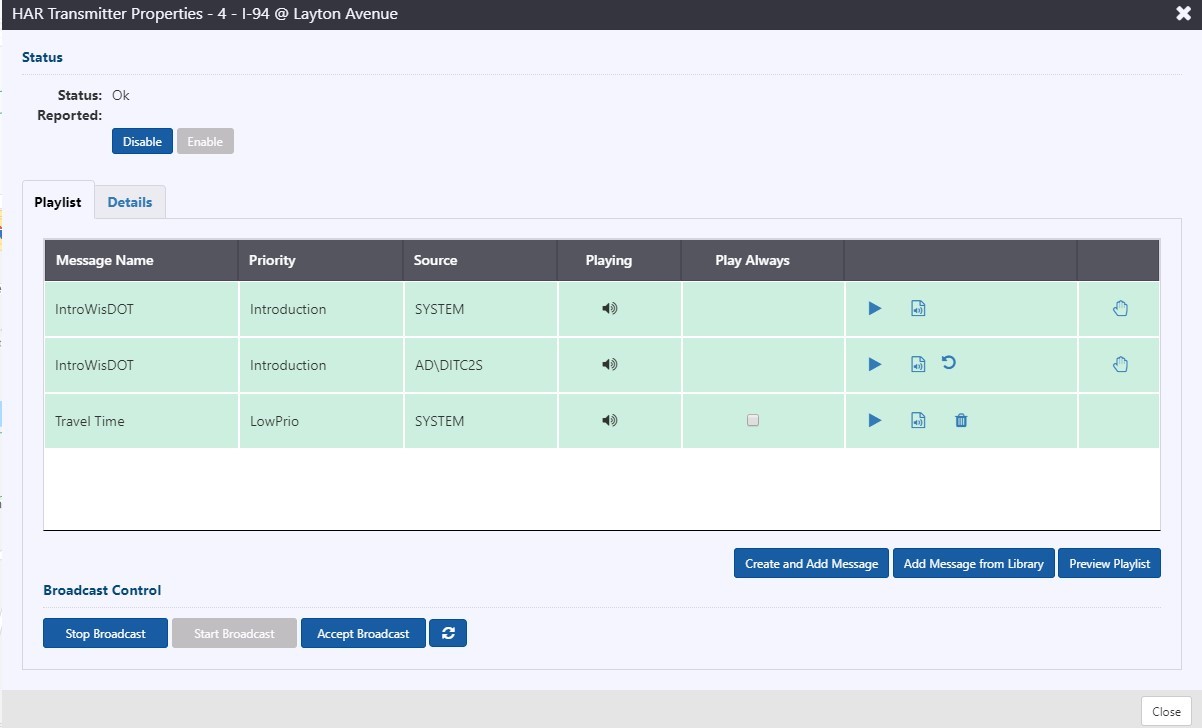
To remove a message from the transmitter queue, click the button next to the message in the queue. The message is greyed out to indicate that it will be removed from the queue, and all messages that will be included in the playlist are highlighted in green. Click Accept Broadcast to publish the updated playlist to the transmitter. To undo the change, click the
button next to the removed message.
Change Order of Messages
To change the order of messages in the queue and playlist, click and drag messages using the button. Messages can only be re-ordered within their priority group. The playlist will always play Introduction messages first, then High Priority, then Low Priority.
Click Accept Broadcast to publish the updated playlist to the transmitter. To undo the change, click the button next to the moved message.
Include a Low Priority Message in the Playlist
To force the inclusion of a Low Priority message in a playlist that includes High Priority messages, check the Play Always box next to the message. Click Accept Broadcast to publish the updated playlist to the transmitter. To undo the change, click the button next to the message.
Get the Text or Audio of a Message in the Queue
To view the text of a message in the queue, click the button. This opens a window containing the text of the message. Click Ok to close it.

To listen to the audio of a message in the queue, click the button. To stop playback, click the
button.
Schedule Messages
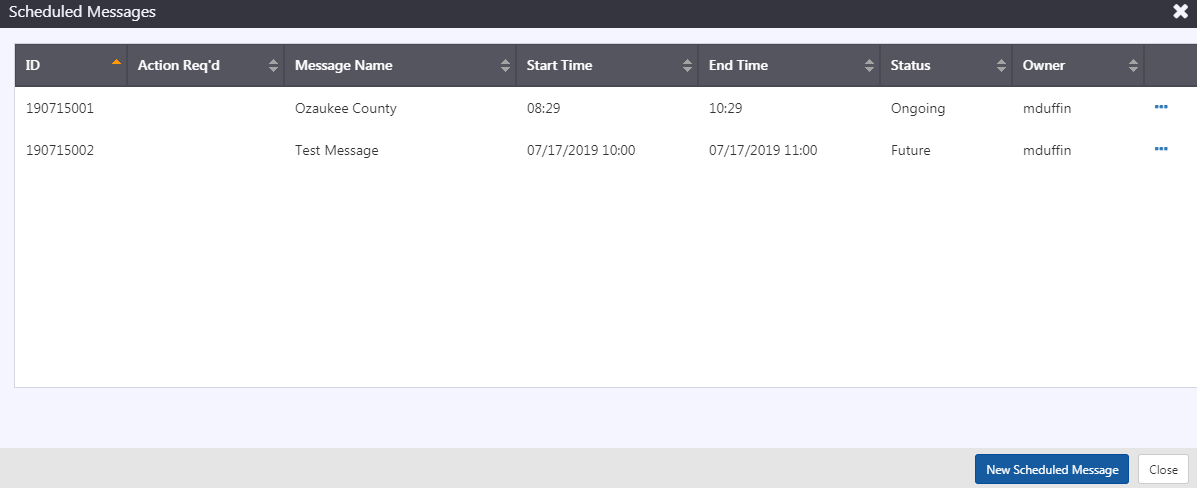
The Scheduled Messages screen can be used to schedule a message for a Transmitter. To access the Schedule Messages screen, right click on the HAR icon on the Action Panel and select Scheduled Messages.
The Scheduled Messages table contains a list of all schedules that are currently being managed by the ATMS. The Status column identifies whether the schedule is currently active (message is in the queue for the transmitter) or not.
Possible statuses include:
| STATUS | MEANING |
|---|---|
| Ongoing | The schedule is in an active period and the specified message has been added to the queue for all signs included in the schedule |
| Future | The schedule is not within one of its planned activation periods. The message is not in the queues for signs included in the schedule. |
You can Edit, Activate, Deactivate or Delete schedules using the menu accessed from the icon next to each schedule.
Create a New Schedule
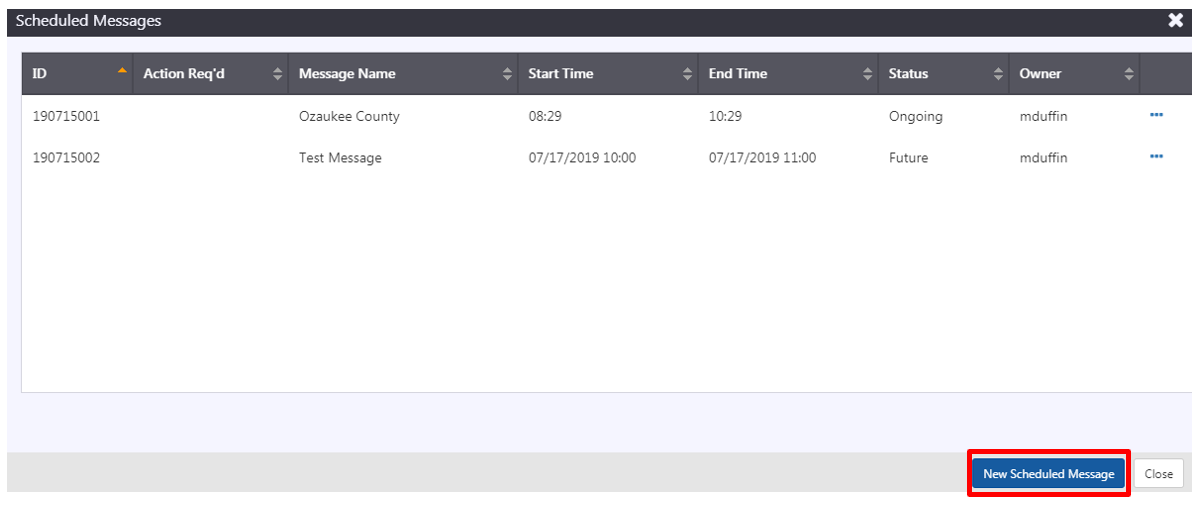
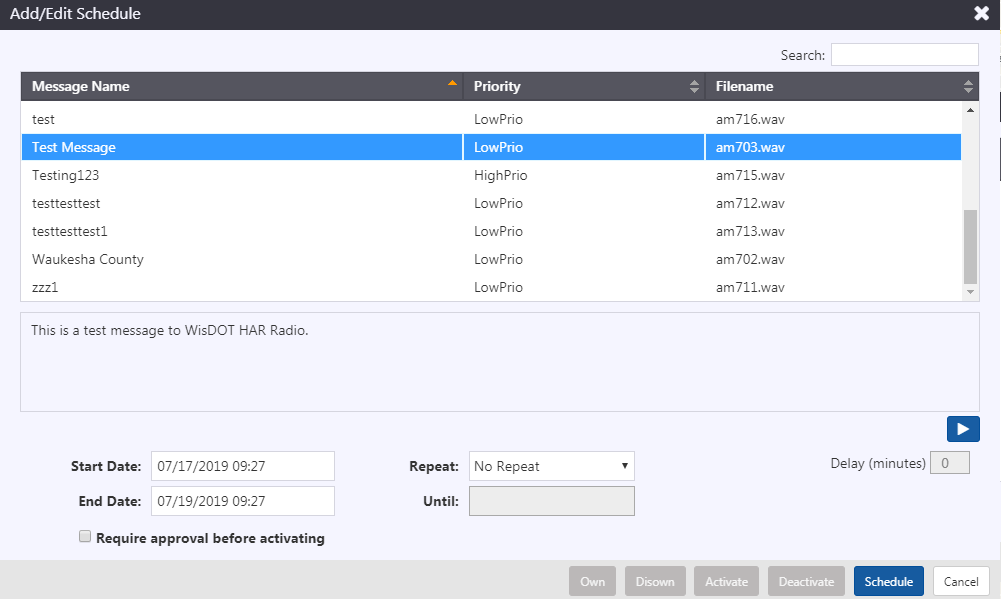
To schedule a message on a transmitter, click New Scheduled Message on the Scheduled Messages view.
Select a message from the library of available messages. The system displays the text of the selected message, and you can optionally preview the audio of the message using the button.
Define the schedule to use for this message (see section Scheduling for details) and click Schedule. You will be asked to confirm that you would like to schedule the message.
Activate a Schedule
To activate a schedule, either:
- Select Activate from the inline menu next to any schedule with a status of Future (the menu is accessed using the
button). The Activate menu item will be grey (disabled) if the schedule is either ongoing or past its scheduled period
- Select Review from the inline menu next to any schedule with a status of Future (the menu is accessed using the
button) and click Activate. The button will be grey (disabled) if the schedule is either ongoing or past its scheduled period
- Click View Schedule on the ATMS notification that indicates a schedule is ready to start and click Activate on the schedule screen
A schedule can be activated at any time that it is not in an Ongoing status (there is no need to wait for the scheduled time to activate the schedule).
When you activate a schedule, the ATMS adds the scheduled message to the queue for the transmitter.
You can only activate a schedule that you are the owner of. To take ownership of a schedule, click on the button next to the target schedule and select the Own option.
Deactivate a Schedule
To deactivate a schedule, either:
- Select Deactivate from the inline menu next to any schedule with a status of Ongoing (the menu is accessed using the
button). The Deactivate menu item will be grey (disabled) if the schedule is either ongoing or past its scheduled period
- Select Review from the inline menu next to any schedule with a status of Ongoing (the menu is accessed using the
button) and click Deactivate. The button will be grey (disabled) if the schedule is either ongoing or past its scheduled period
- Click View Schedule on the ATMS notification that indicates a schedule is ready to start and click Deactivate on the schedule screen
A schedule can be deactivated at any time that it has a status of Ongoing (there is no need to wait for the scheduled time to deactivate the schedule).
When you deactivate a schedule, the ATMS removes the scheduled message from the queue for the transmitter.
You can only deactivate a schedule that you are the owner of. To take ownership of a schedule, click on the button next to the target schedule and select the Own option.
Edit a Schedule
To edit a schedule, select Review from the inline menu (the menu is accessed using the button). Update the scheduled period(s), or the message and click Schedule. The ATMS will ask you to confirm the schedule change.
You can only edit a schedule that you are the owner of. To take ownership of a schedule, click on the
button next to the target schedule and select the Own option.
Delete a Schedule
To Delete a schedule, click the next to the target schedule and select the Delete option. A schedule must be Deactivated before it can be deleted.
You can only delete a schedule that you are the owner of. To take ownership of a schedule, click on the
button next to the target schedule and select the Own option.
Manage the Message Library
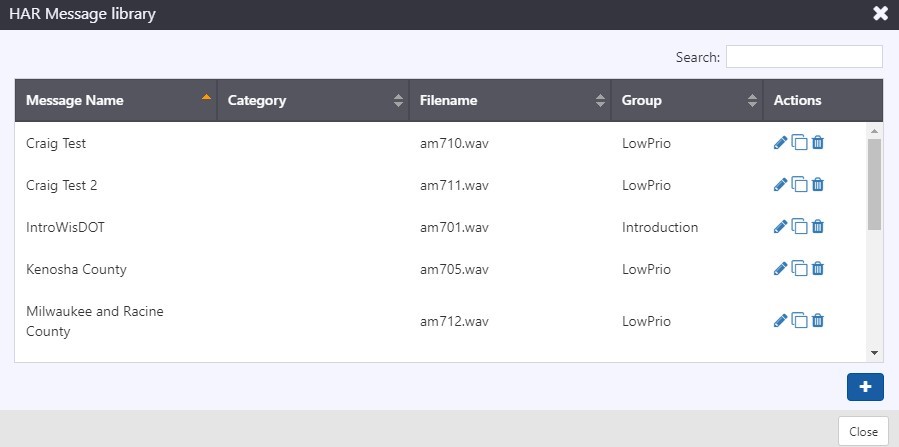
The HAR Message Library screen can be used to add, edit or remove messages to/in/from the HAR message library. Messages in the library are available for use by all transmitters configured in ATMS.
To access the HAR Message Library screen, right click on the HAR icon on the Action Panel and select Message Library.
Add a Message
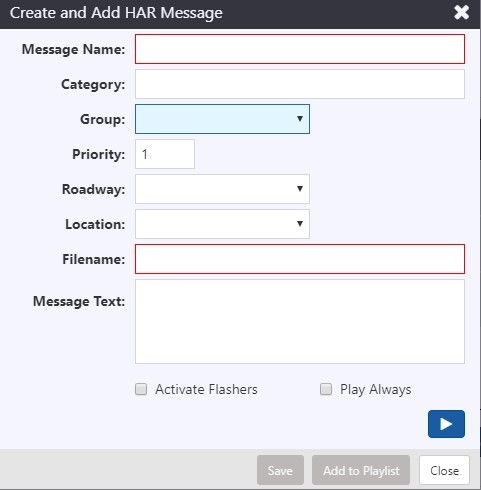
To add a message to the library, click on the button. This opens the Add New HAR Library Message view.
Enter the Message Name, Group/Priority, Priority (applies to ordering of messages within a priority group) and the desired Message Text, and click Save.
Edit a Message
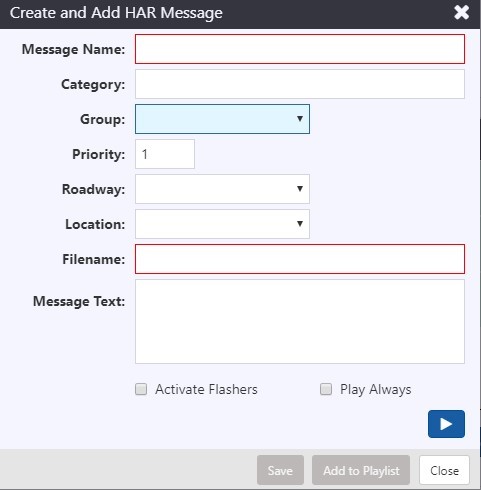
To edit a library message click the button next to the desired message. This opens the HAR message editor. Edit the Group/Priority, priority and message text as needed and click Save.
Remove a Message
To remove a message, click the next to the target message. You will be asked to confirm this action.